Surge in Aurora Sightings: Best Viewing Spots Right Now
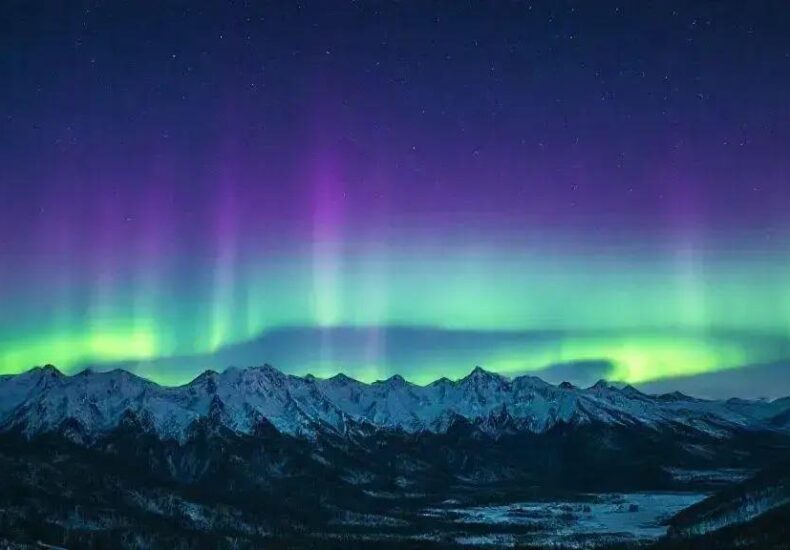
Aurora sightings occur when charged solar particles collide with Earth’s atmosphere near the poles, creating colorful light displays best viewed in dark, clear skies during winter in regions like Alaska, Scandinavia, and Iceland.
Aurora Sightings have been captivating sky-watchers lately with an impressive surge. Wondering where and when to catch this stunning light show? Let’s explore the best spots and tips to enjoy this rare spectacle.
Understanding aurora sightings and their causes
Aurora sightings occur when charged particles from the sun interact with Earth’s magnetic field and atmosphere. These solar particles travel toward the poles and collide with gases such as oxygen and nitrogen, creating the beautiful, glowing lights we call auroras. The process begins with solar wind—a stream of charged particles emitted by the sun during solar storms and flares.
The Role of Earth’s Magnetic Field
The Earth’s magnetic field directs these charged particles toward the polar regions, which is why auroras are usually visible near the Arctic and Antarctic circles. This field acts like a shield, guiding the particles and causing them to accelerate along magnetic lines before colliding with atmospheric gases.
Colors and Altitudes
The colors of the aurora depend on the type of gas and the altitude where the collisions occur. Oxygen at higher altitudes typically produces green and red lights, while nitrogen causes purples and blues at lower elevations. These different colors and shapes result in breathtaking displays that can vary night to night.
Solar Activity and Auroras
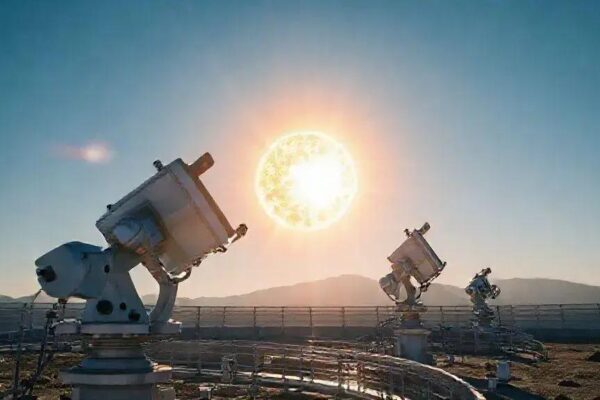
Solar activity, such as sunspots and solar flares, influences the frequency and intensity of aurora sightings. During periods of high solar activity, more charged particles reach Earth, increasing the chances of brighter and more widespread displays. Monitoring solar weather forecasts can help predict when auroras will be most visible.
Understanding these natural forces enriches the aurora viewing experience and allows enthusiasts to better anticipate the best times and places to witness this enchanting phenomenon.
Best regions to see auroras right now
The best regions to see auroras right now are primarily located near the Earth’s magnetic poles, where geomagnetic activity is strongest. In the Northern Hemisphere, popular locations include parts of Alaska, Northern Canada, Iceland, Norway, Sweden, and Finland.
Alaska and Northern Canada
Alaska offers vast wilderness areas ideal for aurora watching, with Fairbanks being one of the top cities due to its clear skies and frequent sightings. Northern Canada, especially Yukon and the Northwest Territories, also provides excellent conditions with minimal light pollution.
Scandinavia
In Europe, Norway, Sweden, and Finland are renowned for their consistent aurora activity. The regions above the Arctic Circle, like Tromsø in Norway and Lapland in Finland, provide some of the most accessible and reliable viewing opportunities.
Iceland
Iceland’s unique landscapes and coastal locations create stunning backdrops for auroras. Areas away from city lights, such as Thingvellir National Park or the Westfjords, are perfect for viewing the glowing sky.
Factors Affecting Visibility
Dark skies away from urban light pollution are crucial for clear sightings. Weather also plays a role, as cloud cover can obscure the aurora. Checking local weather forecasts and solar activity reports can help plan the best nights to witness the spectacle.
Each of these regions has unique features that enhance the viewing experience, from snowy landscapes to icy fjords, making aurora hunting not only a natural show but an adventure in itself.
How to prepare for an aurora viewing trip
Preparing for an aurora viewing trip means planning ahead to maximize your chances of witnessing this spectacular natural event. Start by choosing the right time and location, preferably during the peak aurora season in winter months when nights are longest and darkest.
Clothing and Gear
Bring warm, layered clothing, including thermal wear, waterproof jackets, hats, gloves, and insulated boots. Temperatures can drop well below freezing, so staying warm is essential for comfort and safety during long nights outside.
Essential Equipment
Carry a reliable flashlight or headlamp, extra batteries, and a tripod if you plan to photograph the auroras. A camera with manual settings and a fast lens can capture the lights clearly.
Check Weather and Solar Activity
Track local weather forecasts to avoid cloud cover that may obscure the sky. Use aurora-tracking apps or websites to monitor real-time solar activity for better timing of your outing.
Plan Your Location
Find spots away from city lights with wide, clear views of the northern horizon. National parks, remote countryside, and lakesides are ideal. Consider accessibility and safety when choosing your viewing area.
Health and Safety Tips
Inform someone about your plans, stay hydrated, and carry snacks. Avoid alcohol as it can increase hypothermia risk. Understanding local wildlife and terrain helps keep you safe during nighttime excursions.
Proper preparation increases your chances of enjoying a memorable and safe aurora experience amid nature’s stunning light show.
The science behind the colors in auroras
The vibrant colors in auroras are a result of interactions between charged solar particles and gases in Earth’s atmosphere. These collisions occur at different altitudes, producing distinct hues. Oxygen and nitrogen gases are primarily responsible for the colors you see in the sky.
Oxygen and Its Colors
When oxygen atoms collide with charged particles at high altitudes around 150 miles above Earth, they emit a rare red light. At lower altitudes, approximately 60 miles high, oxygen causes the most common green light, which many people recognize in auroras.
Nitrogen and Its Effects
Nitrogen molecules produce blue and purple colors when they are struck by energetic particles. These colors often appear at lower altitudes and add variety to the aurora display. Nitrogen can also cause pinkish hues when mixed with other colors.
Altitude and Color Variations
The altitude of the particle collisions affects the color intensity and type. Higher altitude collisions tend to create reds and purples, while lower altitudes yield greens and blues. Changes in the solar wind and Earth’s magnetic activity can also lead to shifting colors during an aurora event.
This interplay of gases and altitudes explains why auroras present such a beautiful and dynamic light show, with colors that dance and change throughout the night.
Tips for photographing auroras effectively
Photographing auroras requires specific techniques to capture their vibrant colors and movements clearly. Start with a sturdy tripod to keep your camera steady during long exposure shots. Use a camera that allows manual settings to adjust shutter speed, aperture, and ISO.
Camera Settings
Set your shutter speed between 5 and 30 seconds, depending on how bright and fast-moving the aurora is. Use a wide aperture, such as f/2.8, to let in more light, and adjust ISO to 800 or higher to capture more detail while minimizing noise.
Focus and Composition
Focus manually on a distant bright object or set your lens to infinity to ensure sharp stars and aurora lights. Compose your shot with interesting foreground elements like trees, mountains, or water to add depth and context to your photos.
Use Remote Shutter and Timer
To avoid camera shake, use a remote shutter release or set a 2- to 5-second timer before the shutter fires. This helps keep your images sharp during long exposures.
Additional Tips
Bring extra batteries as cold temperatures drain them quickly. Dress warmly and be patient; capturing the perfect aurora photo might take several attempts. Experiment with different settings and compositions to find what works best in varying conditions.
Following these tips increases your chances of producing stunning photos that showcase the aurora’s beauty in all its glory.
Seasonal timing and solar activity influence
The timing of aurora sightings is closely linked to both the seasons and solar activity. Auroras are most often seen during the winter months in polar regions because of longer nights and darker skies, which provide ideal conditions for viewing.
Seasonal Influence
Winter months from September to March offer the best chance to witness auroras due to extended darkness and clearer skies. During summer, continuous daylight in polar areas makes it virtually impossible to see the aurora, even if solar activity is high.
Solar Activity Cycles
The sun follows an approximately 11-year cycle of solar activity, with periods called solar maximums when sunspots, solar flares, and coronal mass ejections increase. These events release charged particles that enhance aurora activity when they reach Earth.
Predicting Aurora Sightings
Scientists use data from satellites and ground stations to monitor solar winds and forecast aurora events. During high solar activity, auroras can be seen further from the poles and may appear brighter and more frequent.
Keeping track of seasonal timing and solar activity helps enthusiasts plan their trips for the best chance to witness these stunning natural light displays.
Local weather factors affecting visibility
Local weather plays a crucial role in the visibility of auroras, as clear skies are essential for an optimal viewing experience. Cloud cover can completely block the view of the aurora, making even the most active displays invisible to the naked eye.
Cloud Cover
Clear skies are the top priority for aurora watchers. Low, thick clouds can obscure the entire sky, while thin or patchy clouds may only partially block the view. Checking weather forecasts in advance helps determine the best nights for viewing.
Precipitation and Humidity
Rain, snow, or fog can reduce visibility and dampen the conditions needed for a clear aurora sighting. High humidity can cause haze, which scatters light and diminishes the intensity and sharpness of the auroras.
Temperature and Wind
Cold temperatures often accompany clear skies in aurora viewing regions during winter. Strong winds may make it uncomfortable to stay outside for long periods but do not directly affect visibility. Dress warmly and prepare for wind chill to remain comfortable while observing.
Overall, monitoring local weather conditions is key to choosing the right time and place for aurora viewing. Combining weather knowledge with solar activity forecasts improves the chances of witnessing this breathtaking natural phenomenon.
What to bring to an aurora watching night
Bringing the right items to an aurora watching night can make your experience much more enjoyable and comfortable. Since aurora viewing often happens in cold, remote areas, packing thoughtfully is important.
Warm Clothing
Wear layers of warm clothing, including thermal underwear, a good quality insulated jacket, gloves, hats, and waterproof boots. Staying warm is vital as temperatures can drop significantly at night.
Essential Gear
Carry a flashlight or headlamp with red light mode to preserve night vision. Bring a comfortable chair or blanket to sit on, along with snacks and hot drinks to keep your energy up during long waits.
Photography Equipment
If you plan on capturing the auroras, bring a camera with manual settings and a tripod. Extra batteries and memory cards are also recommended since cold weather drains battery life quickly.
Safety and Comfort
Carry a fully charged phone, a portable power bank, and inform someone about your plans. Bug spray may be useful in some regions, and having a first aid kit is always smart. Lastly, check the weather forecast to be prepared for any changes.
Appropriate preparation ensures you remain safe, comfortable, and ready to fully enjoy the magical experience of watching the aurora unfold.
Safety considerations during aurora trips
Safety is a key concern during aurora trips, especially because these outings often take place in cold, remote, and sometimes unfamiliar environments. Proper preparation can help ensure a safe and enjoyable experience.
Dress Appropriately for Cold Weather
Layered clothing is crucial to protect against freezing temperatures. Use thermal underwear, insulated jackets, waterproof boots, gloves, and hats to prevent frostbite and hypothermia.
Be Aware of Your Surroundings
Choose safe, accessible viewing locations and avoid hazardous terrain such as thin ice, steep cliffs, or dense forests. Use a reliable flashlight or headlamp to navigate safely in the dark.
Inform Others of Your Plans
Always let someone know your destination and expected return time. This precaution can be lifesaving in case of emergencies or unexpected changes.
Carry Emergency Supplies
Bring a fully charged phone, portable charger, first aid kit, and extra food and water. Also, consider carrying a whistle or signaling device to attract help if needed.
Understand Wildlife Risks
In some aurora-viewing areas, wildlife such as bears or moose may be present. Learn about local fauna and follow guidelines to avoid encounters or disturbances.
Taking these safety measures seriously will help you enjoy the aurora adventure with peace of mind and minimize risks associated with nighttime and cold-weather outdoor activities.
Wrapping Up Your Aurora Viewing Experience
Planning and safety are key to making the most of your aurora trip. Dressing warmly, choosing the right location, and preparing necessary gear can enhance your comfort and enjoyment.
Understanding weather conditions, solar activity, and safety precautions helps ensure a smooth and memorable adventure under the night sky.
With proper preparation and awareness, you can fully appreciate the breathtaking beauty of the auroras and create unforgettable memories.
FAQ – Common Questions About Aurora Sightings and Viewing Tips
What is the best time of year to see auroras?
Auroras are most visible during the winter months when nights are longest and skies are darkest, typically between September and March.
What should I wear for an aurora viewing trip?
Wear warm, layered clothing including thermal underwear, insulated jackets, waterproof boots, gloves, and hats to protect against cold temperatures.
How can I improve my chances of seeing the aurora?
Choose locations away from city lights, check the weather forecast for clear skies, and monitor solar activity forecasts for high aurora activity.
What camera settings work best for photographing auroras?
Use a tripod, set manual mode with a wide aperture (around f/2.8), shutter speed between 5 and 30 seconds, and ISO around 800 or higher.
Are there safety concerns when going on aurora trips?
Yes, be prepared for cold weather, avoid hazardous terrain, inform someone of your plans, carry emergency supplies, and be aware of local wildlife.
What equipment should I bring to an aurora watching night?
Bring warm clothing, flashlight or headlamp, camera with tripod, extra batteries, snacks, hot drinks, a fully charged phone, and a first aid kit.
You may also like


Leave a Reply